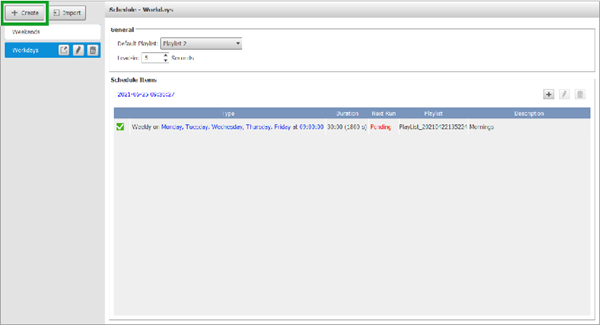
3. 2 Create a Schedule
To create a schedule:
- Click the + Create button at the top of the DS Schedules main menu.
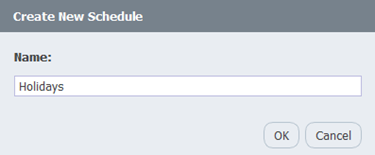
- In the Create New Schedule pop-up window, enter the name for the new schedule.
NOTE: You can change the name of the schedule at any time by clicking the rename button in the schedule list.
- Select the schedule in the schedule list and the schedule will appear in the editing panel.
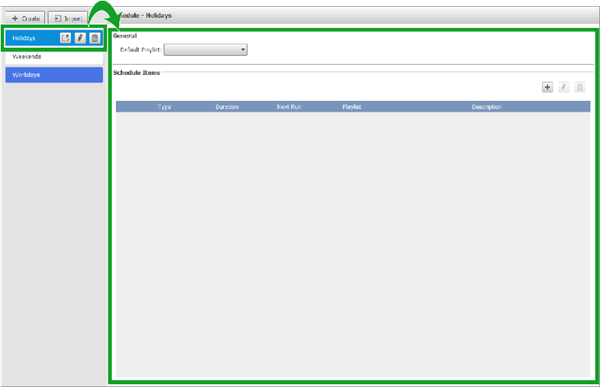
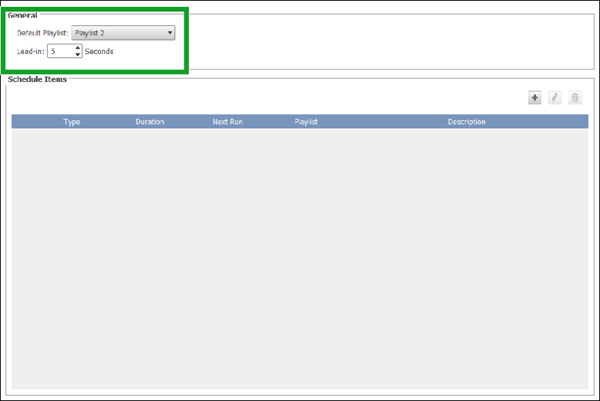
- In the General section of the editing panel, configure the following settings:
- In the Default Playlist drop-down menu, choose the playlist you want to be displayed at any given time when there is no other playlist scheduled.
- In the Lead-in field, select the amount of time (in seconds) between transitions to different schedule items.
Once you have finished the steps above, you can begin adding individual schedule items to the schedule. Go to Adding a Schedule Item for further instructions on adding schedule items.