2.1 Get Started
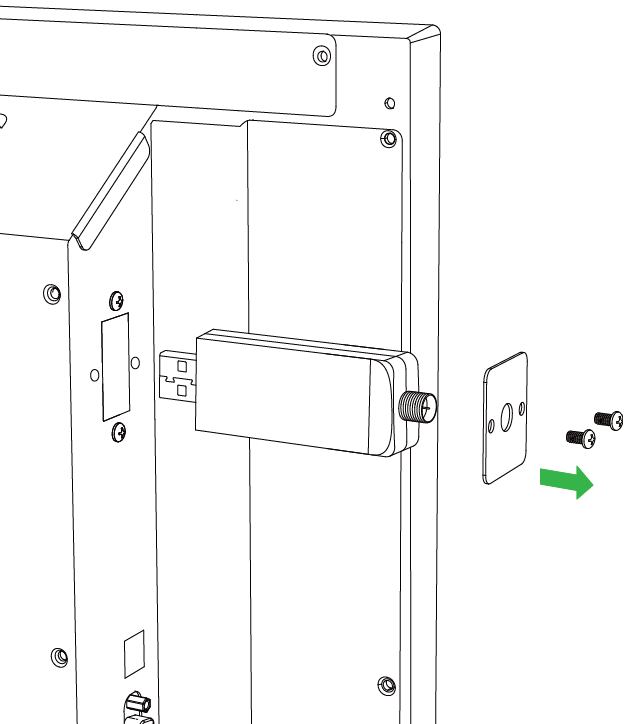
Installing the Wi-Fi Module (DK3 series)
In order for the display to have access to a wireless network or Internet, you must first install the Wi-Fi module included with the product. To install the Wi-Fi module:
Important: The USB Wi-Fi module is not designed to support plug-and-play. Namely, if you install or remove the Wi-Fi module when the system is up and running, please restart the system before using Wi-Fi. Otherwise, the Wi-Fi module may malfunction. In other words, it is a best practice to install or remove the Wi-Fi module after the system is fully shut down.
1. Remove the metal cover and fully insert the WiFi module into the installation bay. (Follow the arrow annotation for direction.)
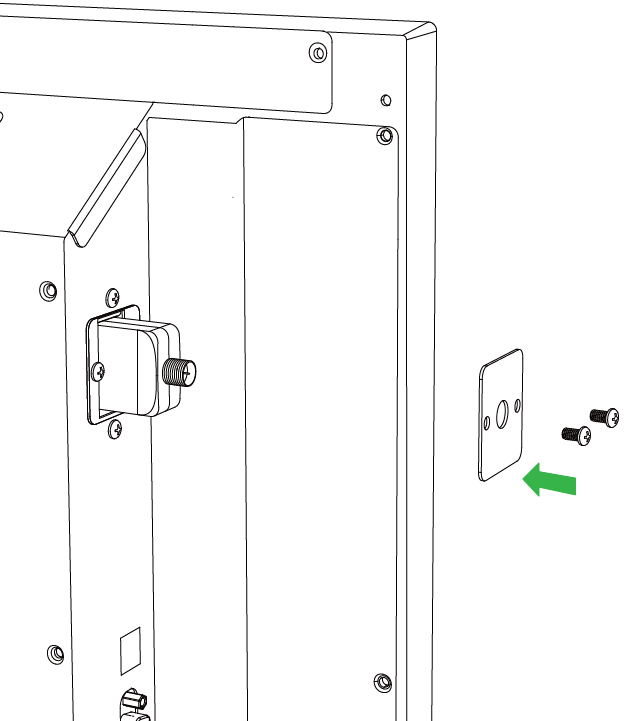
2. Secure the cover with screws. Make sure the antenna screw-on stud is positioned and exposed preperly.
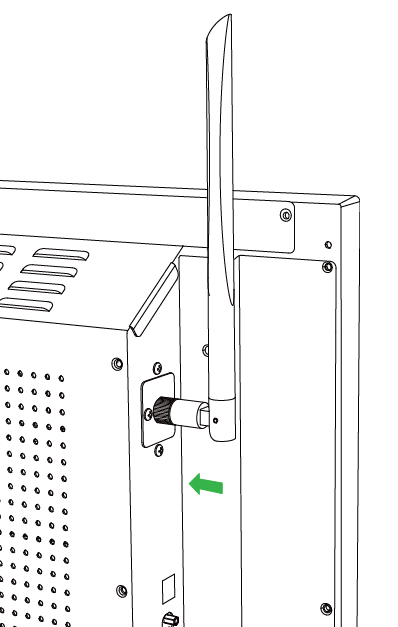
3. Attach the external antenna securely to the screw-on stud.
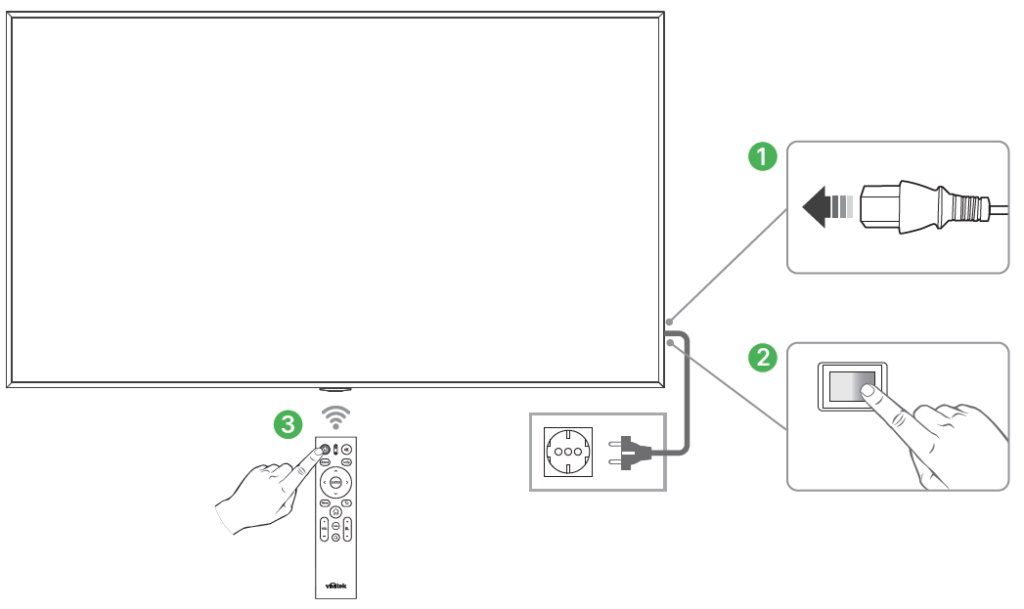
Powering the NovoDisplay
After mounting/installing the NovoDisplay in the desired location you must supply power to the display using the following steps:
1. Plug the supplied power cable into the display and a power source.
2. Turn the power switch located at the right side of the display on.
3. Press the power button on the display or the remote control to power on the display.
NOTE: Only use the power cable provided in the packaging with the display.
Remote Control
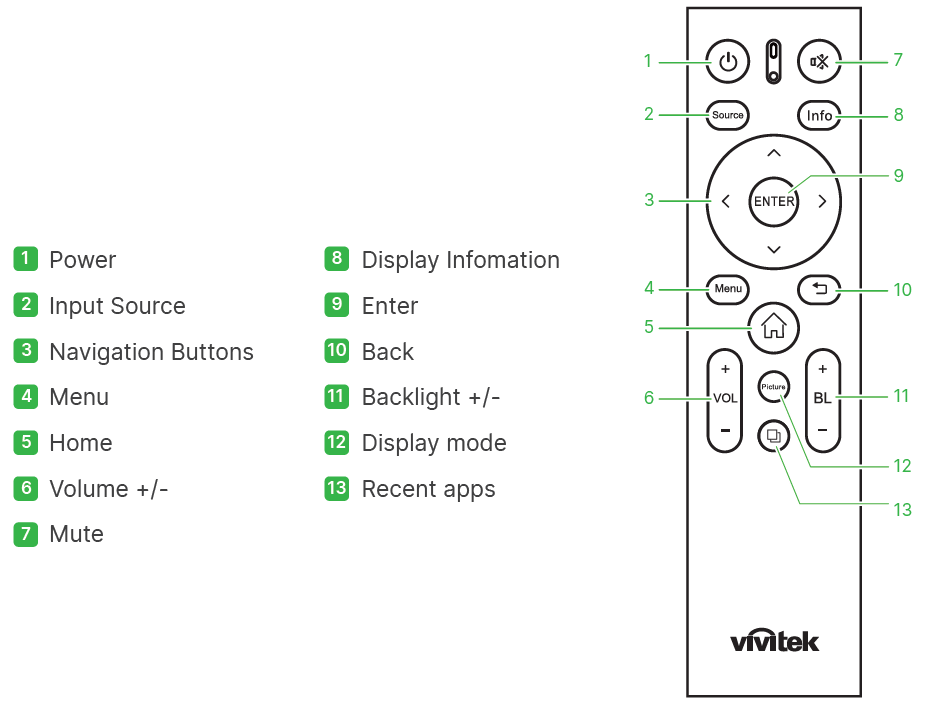
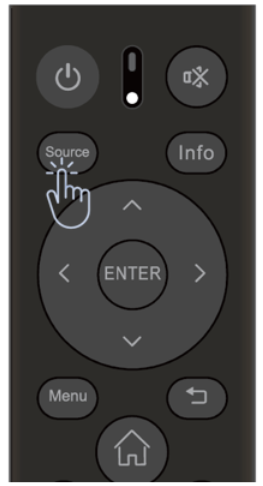
Switching Input Source
After making a video input connection, open the input source menu to select which input source to show on the display.
● Press the Source button on the remote control.