InformaCast by Singlewire Software
InformaCast is a 3rd-party service which enables users to publish emergency messages to reach vast audience efficiently. These messages can be received via digital signage devices, mobile phones, desktop application software, etc. NovoDS solutions support Singlewire, namely, users can set up NovoDS devices to receive and display emergency messages published by Singlewire.
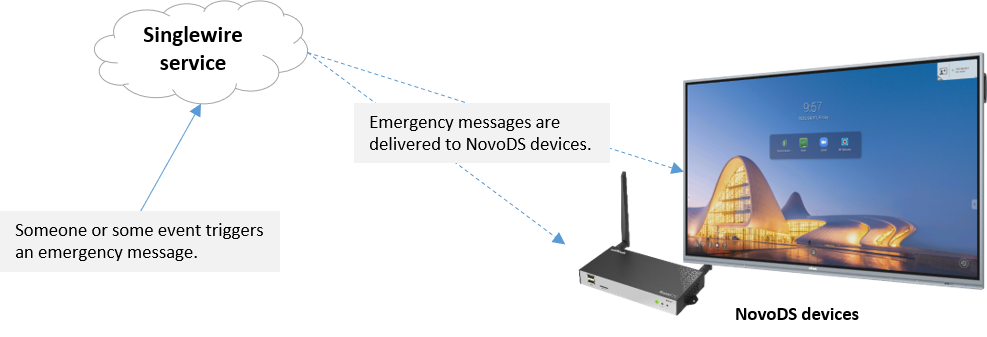
The remaining section describes the basic concept and setup instructions of setting up Singlewire on NovoDS devices.
Basic Concept
There are three simple steps to set up this service.
- Create Access ID and the corresponding Outbound URL using Singlewire’s Recipient token. The helper webpage will guide you through the process quickly.
- Set up Singlewire’s Outbound CAP with the Outbound URL
- Create “NovoDS Announcement” with the Access ID and deploy it to NovoDS devices
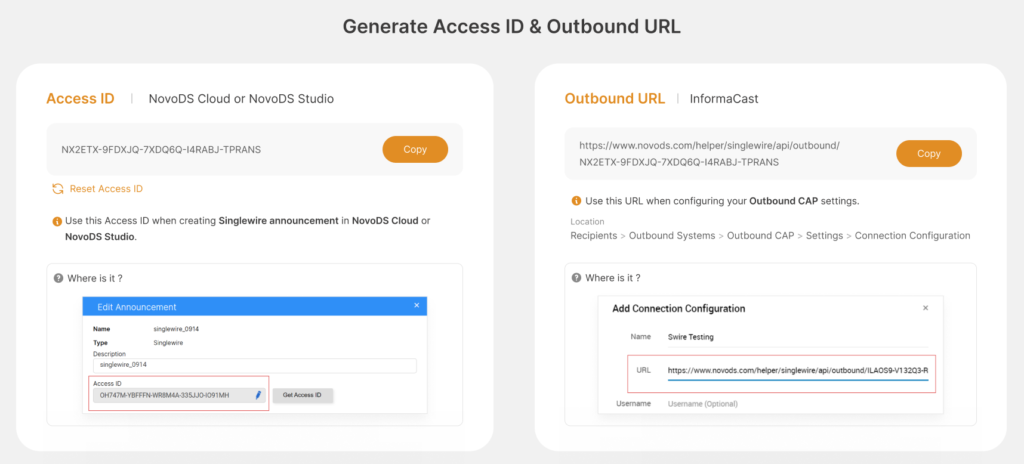
As you can see, Access ID and Outboard URL, generated usingSinglewire’s Recipient token, are the two key parameters that bind the Singlewire serivce and NovoDS devices together.
Once all these are set up properly, NovoDS devices will then automatically receive and display messages pushed by the Singlewire service.
Setup Instructions
The following instruction videos illustrate how to set up NovoDS devices to receive Singlewire messages. A detailed text-based description is also presented right after the video section.
(1) Create Recipient Token
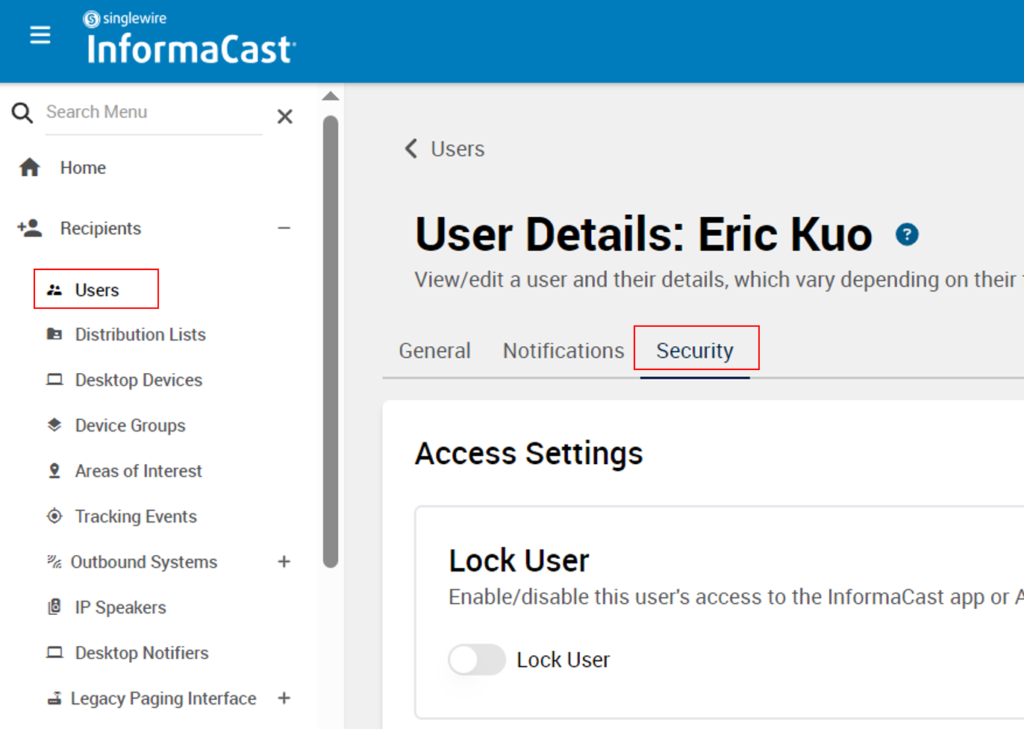
Log in your Singlewire service to retrieve Recipient token. Go to “Recipients” > “Users” > “Security” > “Token”, and create a token with long life.
Please copy this token for use later.
(2) Create Access ID & Outbound URL
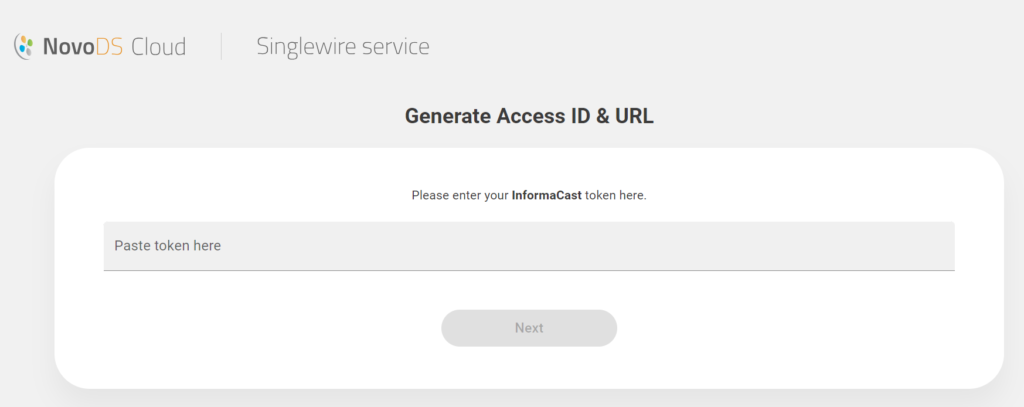
Go to this helper webpage and paste the Recipient token obtained in previous step to the input field. Click on button “Next”.
Now you have both the Access ID and the Outboard URL.
(3) Set up Outbound CAP in Singlewire Service
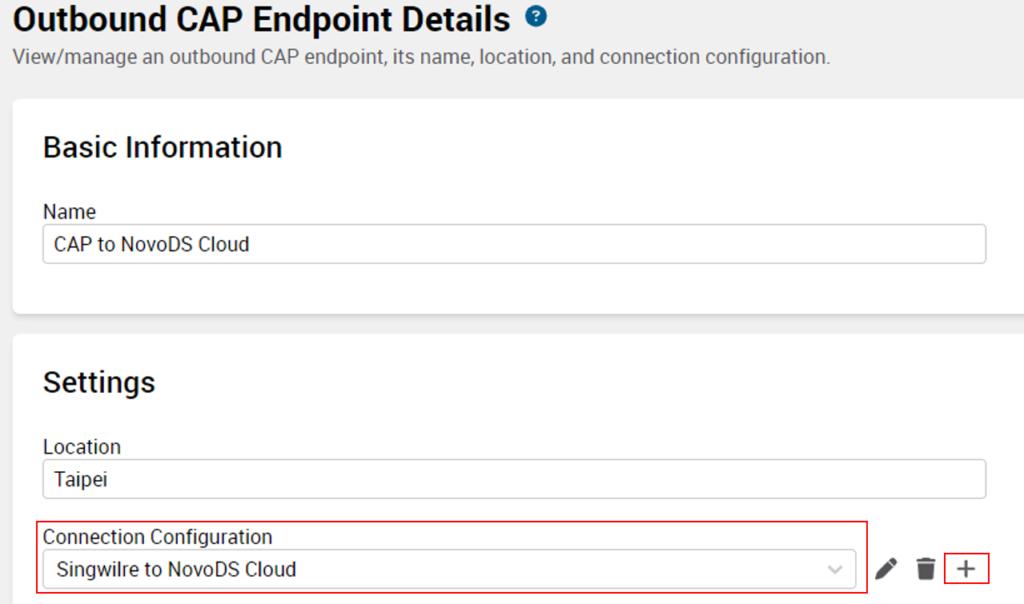
In your Singlewire service, go to “Recipients” > “Outbound Systems” > “Outbound CAP” to create new “Connection Configuration”

Now, enter the Outbound URL in the URL field. connection configuration and paste URL, as highlighted in the picture below. Save it when you are done.

Select the “Connection Configuration” which you created, and save it.
(4) Set up Message Templates in Singlewire Service
Go to “Notifications” > “Message templates”, and click “Create Message template”. Fill in the info as you see fit. The most important step is to set up “Outbound Systems” using the Outbound CAP set up in the previous step.

Now, you can use this message template to publish messages, which will be sent over to the Outbound CAP endpoint and hence received by NovoDS devices.
(5) Create and Deploy NovoDS Announcement
Next, we are going to create and deploy a Singlewire announcement to “connect” NovoDS devices to InformaCast’s Outbound CAP. The UI flows in NovoDS Cloud and NovoDS Studio are essentially the same, but with some minor difference. We present both in the sections below.
(5.1) NovoDS Cloud
Log in your NovoDS account and Go to “Announcements” to “Add New Announcement”.
Select type “Singlewire” and fill in the info as you see fit.
- In the “Access ID” field, enter the Access ID generated in one of the steps above. (If you don’t have an Access ID, click on button “Get Access ID” to start the process.)
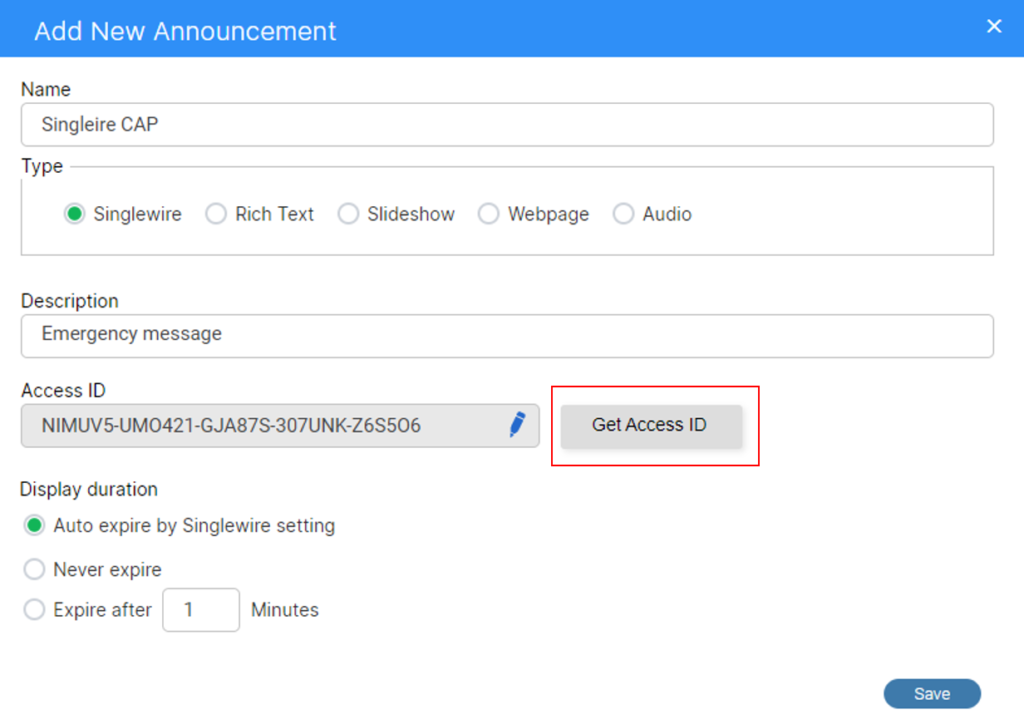
Save the Announcement and you can publish it to the NovoDS devices you choose.
(5.2) NovoDS Studio
Launch NovoDS Studio and then go to “DS Devices > Singlewire”.

Click “Create” to create a Singlewire announcement.

Fill in the info as you see fit.
- In the “Access ID” field, please reference previous section.
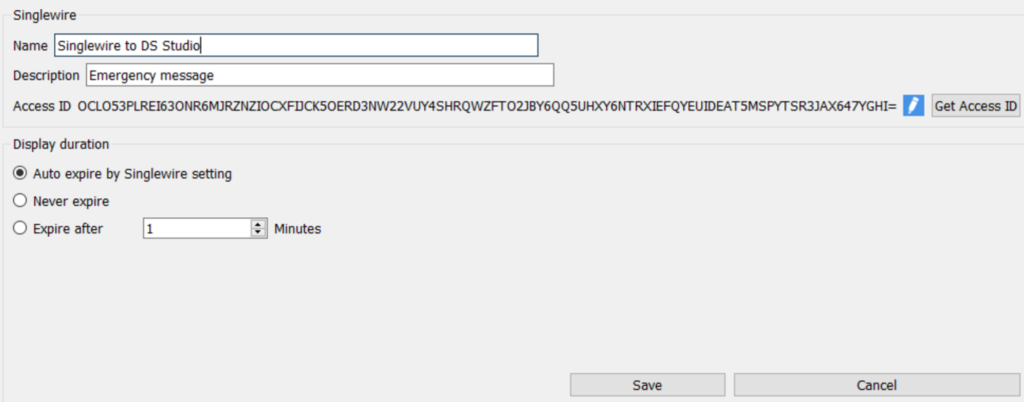
Once it is done, click “Save” to finish creating/editing the Singlewire announcement.
To deploy the announcement on a NovoDS device, go back to the device list and connect to the device. Then, click on “Schedule & Singlewire” icon and then “Singlewire Setting”. Select the desired Singlewire announcement and it will be deployed to the device right away.

(6) Push Singlewire messages
Now, we can use Singlewire service to publish announcement to NovoDS devices.
- Click “Send” icon which on the top of right side. After click, you will see message templates.

- Select one of the template, then click “Send” button.

(7) The End…
Now, sit back and relax… When you or someone pushes a message using Singlewire service, the NovoDS devices will receive and display it automatically.