Installing the Wi-Fi Module (EK-2 series)
In order for the display to have access to a wireless network or Internet, you must first install the Wi-Fi module included with the product. To install the Wi-Fi module:
1. Remove the two screws on the Wi-Fi module slot cover.
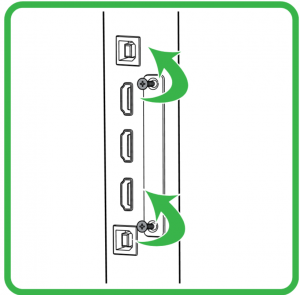
2. Remove the Wi-Fi module slot cover.
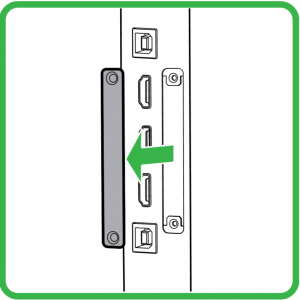
3. Insert the Wi-Fi module into the slot.
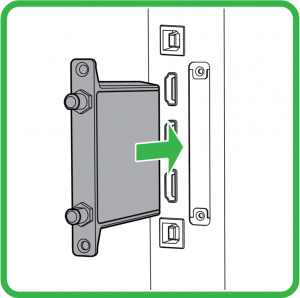
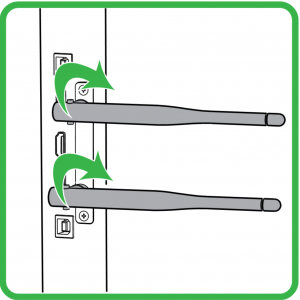
4. Install the two screws to secure the Wi-Fi module to the display, and then install the antennas onto the Wi-Fi module.
Installing the Wi-Fi module (EK-3 series)
- Take off the cover

2. Insert the WiFi module fully into the NovoTouch along the direction of the arrow.

3. Complete assembly

Powering the Display
After mounting/installing the NovoTouch in the desired location you must supply power to the display using the following steps:
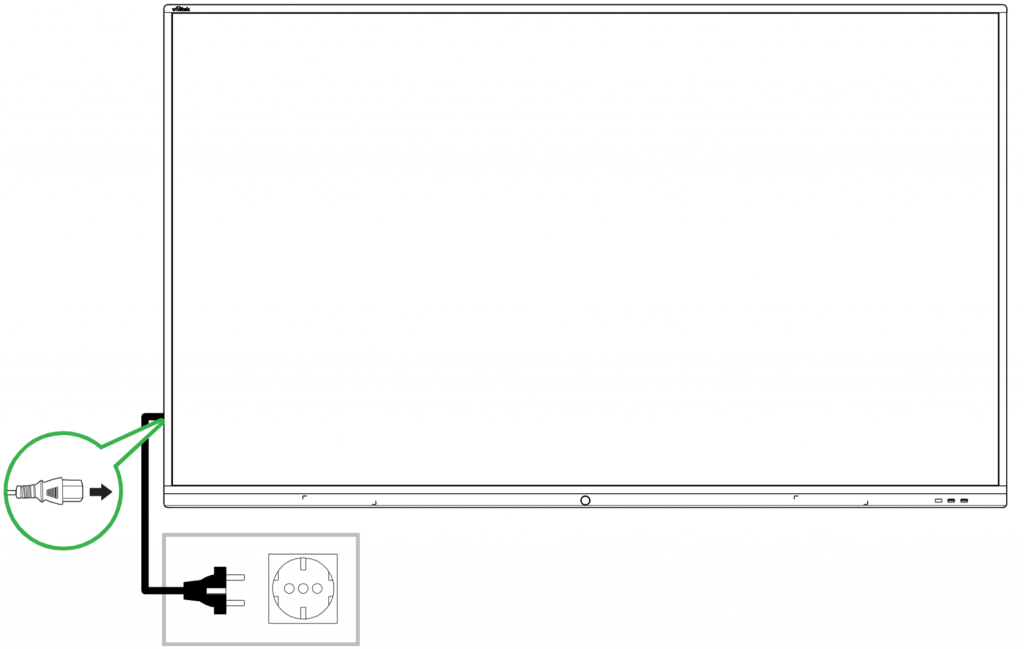
1. Plug the supplied power cable into the display and a power source.
NOTE: Only use the power cable provided in the packaging with the display.
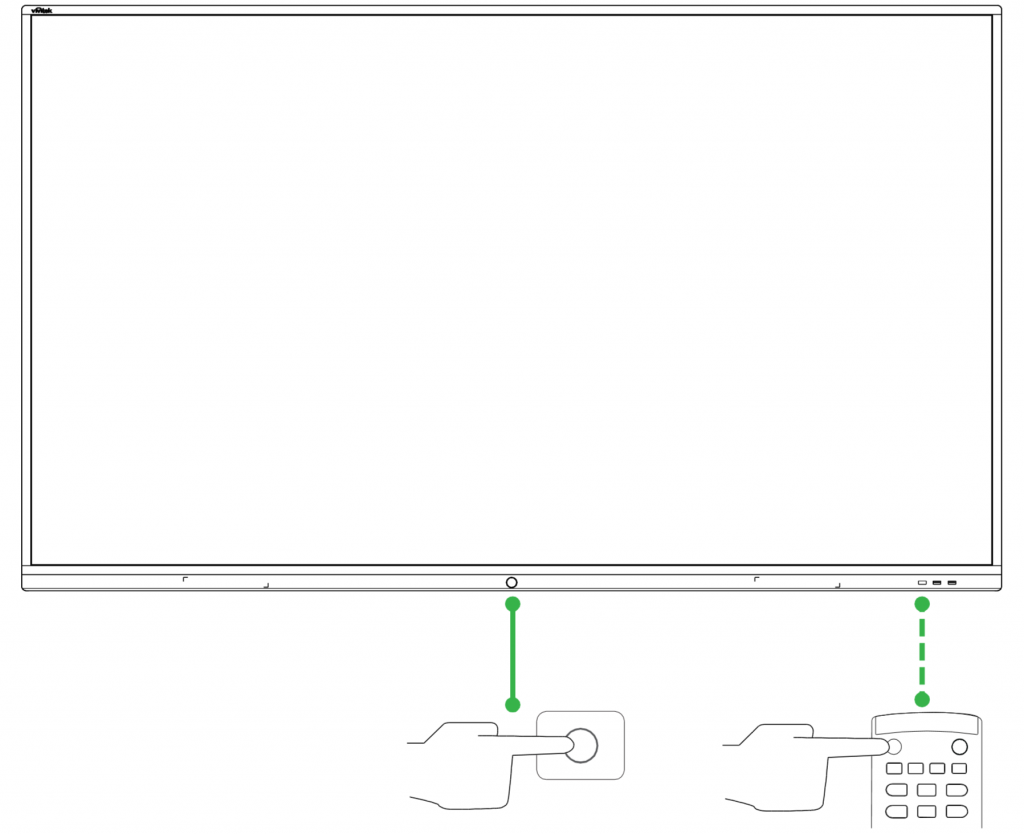
2. Turn the power switch located at the right side of the display on.
3. Press the power button on the display or the remote control to power on the display.
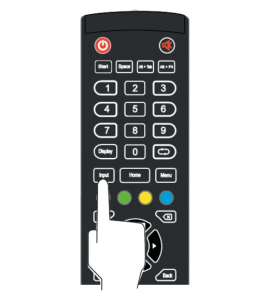
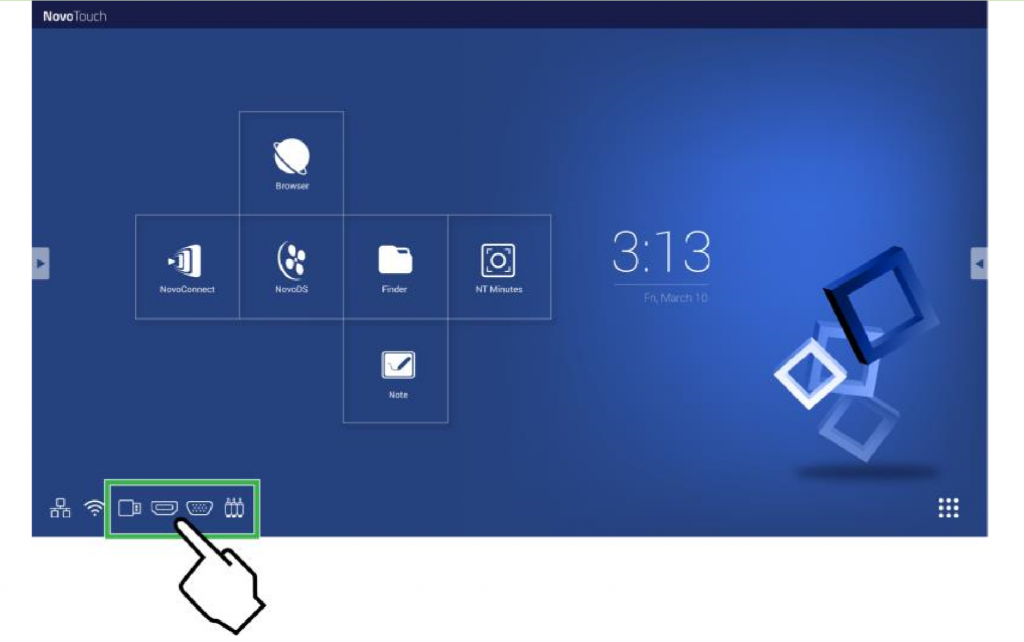
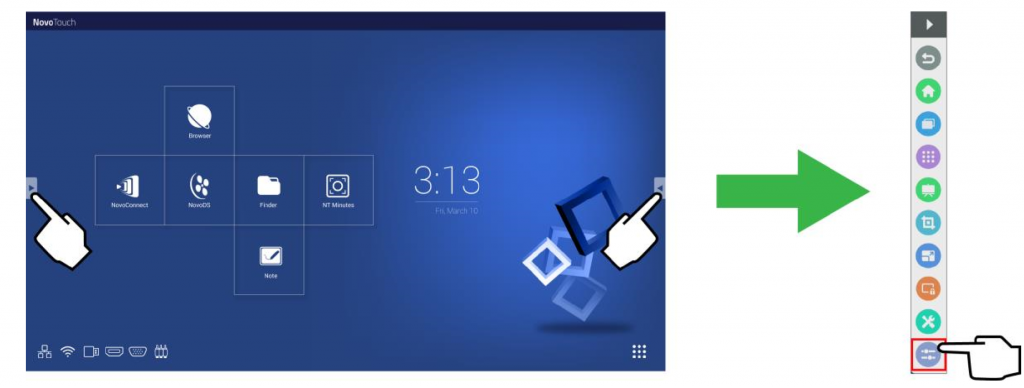
Switching Input Source
After making a video input connection, open the input source menu to select which input source to show on the display. To open the input source menu, choose one of the following methods:
● Press the Input button on the remote control.
● Tap the input source icons at the bottom of the home screen.
● Tap the tool bar on the either side of the home screen, and then tap the input source button in the tool bar.
Once the input source menu is open select the video input you want to show on the display. Video inputs with a blue dot underneath indicate video inputs that are currently connected.